Construction of a 10" Dobsonian Telescope
 One of the first things I did before doing any physical work was to do a lot of research on the types of telescopes that I would have the most success on actually completing successfully. I would recommend before attempting to build your own scope that you consult a local astronomy group, library, or the Internet for as much information on telescope building as possible. My favorite place is the Amateur Telescope Makers
Archives. This is a mailing list with an incredible amount of information. In fact too much for me to list here. You should check this site out first before attempting to build your first scope.
I already had a 10" F/5.6 primary mirror along with a 2.6" secondary which I had purchased years ago when Coulter Optical was still in existence. I also had a spider with a diagonal holder and a primary mirror mount. So, all I needed now was a tube and to build a new mount. The tube I decided to construct from Sonotube.
One of the first things I did before doing any physical work was to do a lot of research on the types of telescopes that I would have the most success on actually completing successfully. I would recommend before attempting to build your own scope that you consult a local astronomy group, library, or the Internet for as much information on telescope building as possible. My favorite place is the Amateur Telescope Makers
Archives. This is a mailing list with an incredible amount of information. In fact too much for me to list here. You should check this site out first before attempting to build your first scope.
I already had a 10" F/5.6 primary mirror along with a 2.6" secondary which I had purchased years ago when Coulter Optical was still in existence. I also had a spider with a diagonal holder and a primary mirror mount. So, all I needed now was a tube and to build a new mount. The tube I decided to construct from Sonotube.
 Friday, July 2, 1999 4pm
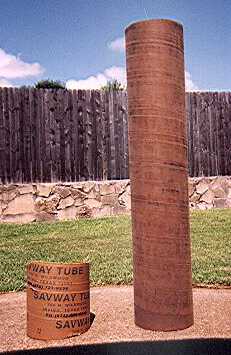
I purchased a 12" diameter 6' piece for 24 dollars (probably a little high, however it was the least expensive). I first cut the tube to 60" in length with a craft knife. I then began the task of lightly sanding the outside of the tube to remove the light wax surface on it. Then I brushed on paint thinner on the inside of the tube to help break down the thicker wax surface. Then I sanded the inside of the tube.
Saturday, July 3, 1999 6am
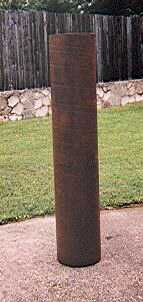
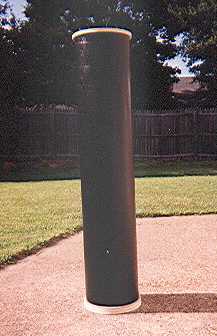
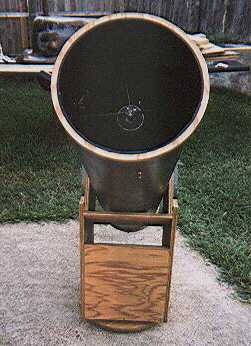
After completing the sanding, I used a water sealant on both the inside and outside of the tube. I will wait 24 hours and then place another coat of the water sealant on both the inside and outside of the tube. At right, is a picture of the tube after cutting to size, sanding, and water sealing.
Sunday, July 4, 1999 6am
I added one more coat of water sealant to the inside and outside of the tube. I also spent a couple of hours sanding down my old dobsonian mount that I had built several years ago and will do some minor restoration on it. Later in the evening, I administered super glue to the ends of the tube to harden them. I was a little apprehensive on doing this due to some prior posts in the Amateur Telescope Makers Archives stating that some had difficulty painting over this. However, this should not be a problem as I intend to cut end rings both for the inside and outside of the tube. So any more stability that I could give to the ends of the scope were that much more benefit without sacrificing the possible appearance of the glue. I might also add that the super glue did an unbelievable job at hardening. After 30 minutes I was able to sand it down to a nice firm, but smooth surface.
 Monday, July 5, 1999 9am
I lightly sanded both the inside and outside of the tube. After removing as much of the sanding from the tube with a cloth, I then epoxied the outside and the inside of the tube where it will set for the next 72 hours.
Thursday, July 8, 1999 4pm
Well it has been 72 hours since I first epoxied the outside of the tube. Unfortunately, it has not cured completely in 3 or 4 areas. After a post to the ATM list describing my problem I received several suggestions. Though the areas that had not cured completely were just tacky to the touch I believe that the cause of this was that the epoxy had not been well mixed which allowed most of the area of the tube to harden and only a few places curing slower.
Friday, July 9, 1999 9am
I chose to apply another light coat of epoxy back on the outside of the tube which I applied with a lint free cloth and some real "elbow grease", in hopes that the hardener in the new coat would be able to help activate the tacky areas. I am pleased to say that after only 3 hours the epoxy was almost hard as a rock over the entire tube. This being done I then placed a 1st coat of epoxy on the inside of the tube about 10pm the evening.
Saturday, July 10, 1999 6am
The inside of the tube is rock hard after only 8 hours. It certainly appears that the people who responded to my epoxy problems knew what mistake it was that I had made. (I did not mix the resin and hardener completely). I will now wait until Monday before sanding.
Monday, July 12, 1999 11pm
I epoxied the inside and outside of the scope, for a total of 3 coats on the outside and 2 coats on the inside. I have also decided against restoring my old dob mount and instead have decided to build a new one.
 Tuesday, July 13, 1999 8am
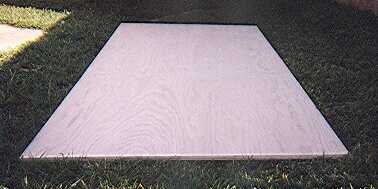
I purchased a 4' x 8' sheet of 3/4" oak plywood for $50.00. Later in the day I cross cut a piece that was 16" x 48" that will be both side bearing boards. I also ripped a piece that was 12" wide by 53" in length, this piece will be the tube box. The pieces will be 2 - 12" x 12 1/4" and 2 pieces 12" x 14".
 Thursday, July 15, 1999 4pm
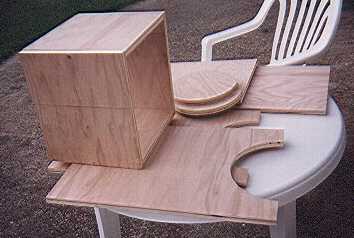
I cut the 4 pieces for the tube box on a table saw that were 12" x 12 1/4". I also used a router and a makeshift circular jig and cut a 10" circle out of the middle of the 16" x 48" side bearing board. I then cut through the center of the circle cut-out in the side bearing board and now have 2 perfect side bearing boards. The one 10" circle will be one side bearing and I then cut out another 10" circle for the other side bearing. I attached the tube box by countersinking 8 x 1 1/4" wood screws. I then lightly sanded the tube box and then applied water sealant to it.
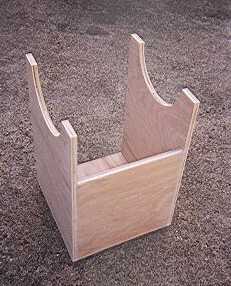
Friday, July 16, 1999 3pm
I cut a piece 16" x 14" for the front board for the mount and another piece 15 1/4" x 14" for the bottom board.
Saturday, July 17, 1999 8am
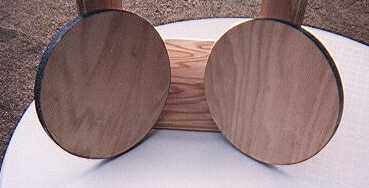
I also cut 2 strips of Ebony Star Formica and attached each to the 10" circle disks with a water resistant silicone adhesive and then used masking tape to hold the Formica as a clamp. I also attached the side bearing boards to the front board and the bottom board with countersunk wood screws. I then applied wood filler, allowed drying and then sanded the entire mount.
 Sunday, July 18, 1999 8am
I removed the masking tape clamps from around the 10" circle bearings. I then trimmed away the overlapping Formica with a craft knife by scoring the Formica and then bending it at the edge of the disk. This really worked well and took no time. I then sanded the bearings lightly and then applied water-sealant to both bearings and let sit for 24 hours.
Monday, July 19, 1999 5pm
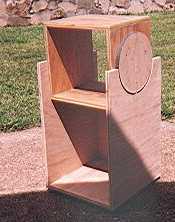
I attached the bearings to the tube box using countersunk wood screws. I then applied oak wood filler, let dry, and then sanded. After this, I applied water sealant to the mount and let sit for 24 hours.
 Monday, July 19, 1999 9pm
I then measured for the primary mirror mount, spider, and focuser. I then drilled the hole for the focuser then lightly sanded the outside of the epoxied sonotube. I then cut 3 tube rings that were 12.25" inches in inside diameter to fit over the tube ends. I then lightly sanded the tube rings, applied water-sealant to them, then let them sit for 24 hours. I then used Krylon ultra flat black spray paint and painted the inside of the tube. After the inside of the tube had dried I then painted the outside of the tube with an enamel satin black gloss paint. I let this sit for 24 hours and then added another coat.
Tuesday, July 20, 1999 5pm
I stained the tube box, mount, and tube rings with a golden oak stain and then let dry for 24 hours. I also cut a 16" diameter piece and 18" diameter piece and applied water-sealant to both and let sit for 24 hours.
 Wednesday, July 21, 1999 5pm
I epoxied a piece of ebony star formica to the 16" piece and epoxied the other side of the 16" piece to the mount. I then cut 3 feet and attached them to 18" diameter piece and on the other side I attached 3 pieces of teflon directly above where I had attached the 3 feet.
Thursday, July 29, 1999 5pm
I then drilled a 3/8" hole through the bottom of the mount, and through the 16" formica bottom piece, and finally through the 18" ground board. I then placed the tube in the tube box, then attached the ground board to the bottom board on the mount and then attached 2 pieces of teflon to each side bearing board on the mount. I then placed the tube on the mount and the movements were unbelievably smooth in both azimuth and altitude. I viewed through it this night and the views were average (due to the mirrors). However, the mount moved exceptionally well. I will most likely have the mirrors recoated as the diagonal has really started to lose its aluminum.
Unfortunately my e-mail is down thanks to the E-Mail Spam Bots!